
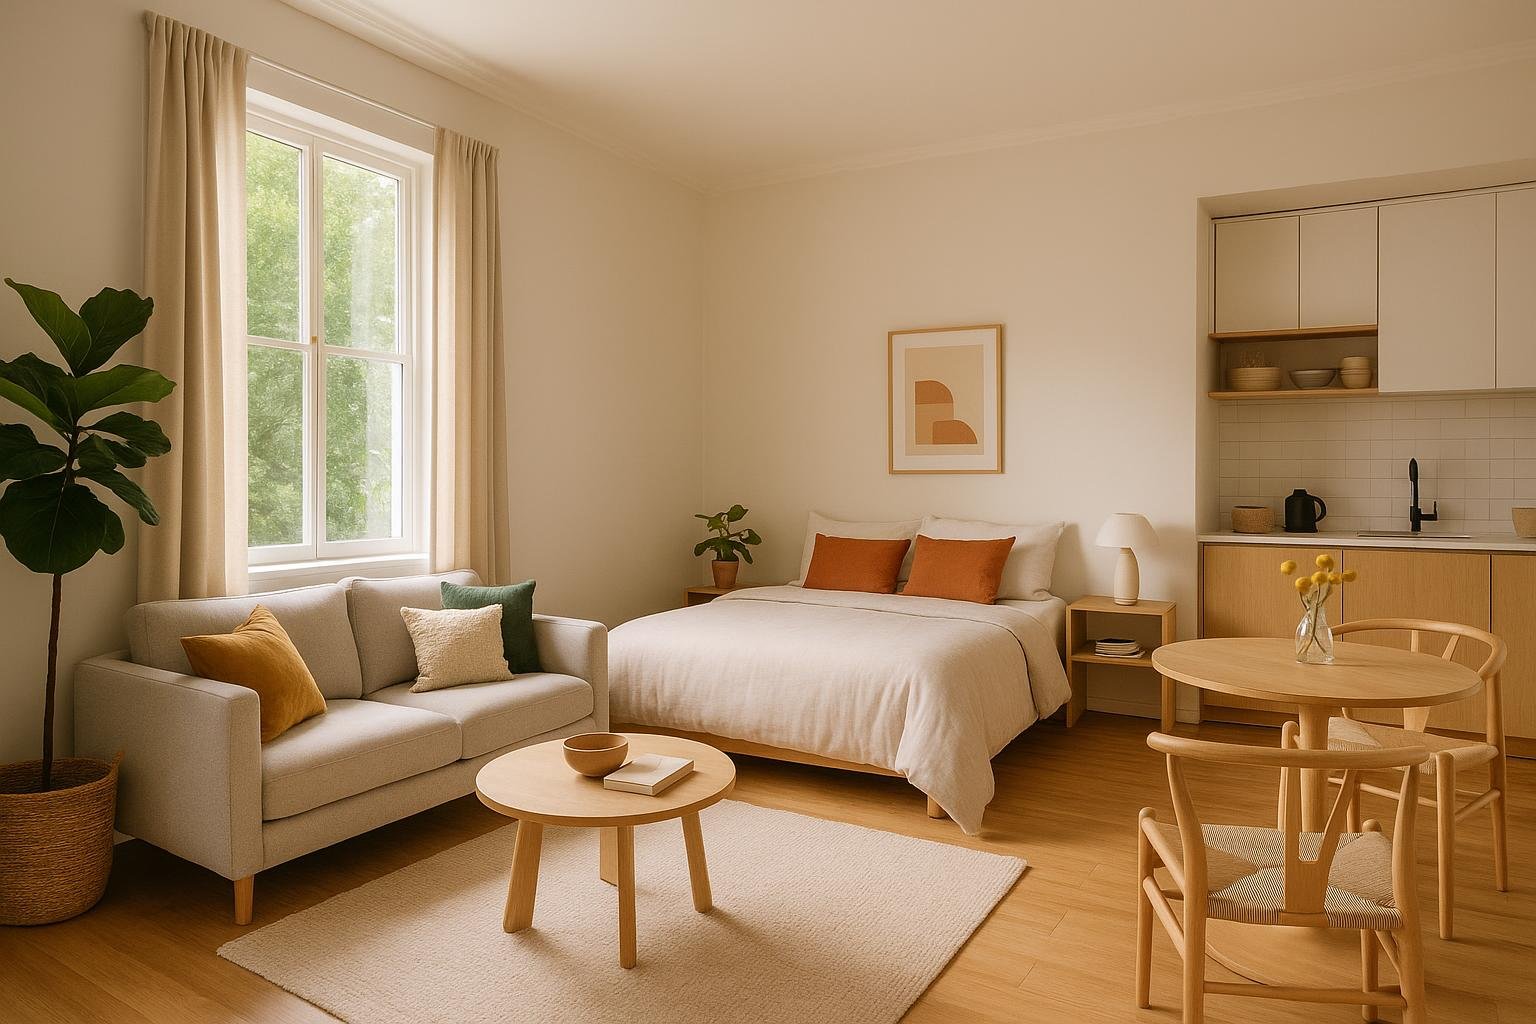
Studio Apartment Interior Design Ideas That Feel Spacious
Designing a studio apartment that actually feels spacious is less about square footage and more about strategy. When you only have one main room, every choice matters: where you put the sofa, how you divide the space, even how you run your extension cords. With a clear layout, smart storage, and a few visual tricks, a studio can feel open, calm, and highly functional instead of cramped.
This guide walks through practical studio apartment interior design ideas that make a small space feel bigger—without sacrificing comfort or personality.
Start With a Plan: Map Your Zones
Before buying a single piece of furniture, decide how you want the studio to work. A spacious-feeling layout starts with clear activity zones, not randomly placed furniture.
- List your essentials. Sleeping, relaxing, eating, working, entertaining—what needs to happen in this room daily?
- Measure everything. Measure the room (including ceiling height), windows, doors, and any existing pieces you plan to keep.
- Draw a simple plan. On paper or using a free app, sketch where your bed, sofa, table, and desk could go. Leave one clear walkway that doesn’t zigzag around furniture.
Plan to place the largest pieces first—usually the bed and sofa—then fit smaller furniture and storage around them. This top-down approach prevents the space from becoming a collection of mismatched, undersized items that don’t work together.
Define Zones Without Closing Off the Space
The most successful studio layouts create visual separation between “rooms” while keeping sightlines and light as open as possible.
Use Furniture to Create Subtle Boundaries
- Area rugs are one of the easiest tools. Use one rug for the “living room” and another (or a smaller mat) by the bed to signal distinct zones.
- Sofas and consoles can act as room dividers. Place the back of a sofa toward the bed area, perhaps with a slim console table behind it.
- Open-backed bookcases divide space while letting light through. Use them to separate sleeping and living areas without creating a solid wall.
Light, Flexible Dividers
If you want more privacy around the bed without boxing yourself in:
- Sheer curtains or ceiling-mounted tracks can frame the sleeping area and pull back fully during the day.
- Folding screens offer flexibility—set them up when you have guests, fold them away when you want more air and light.
The key is to choose dividers that are visually light—open slats, fabric, or glass—so daylight and air can still flow through the studio.
Choose Furniture That Works Double (or Triple) Duty
Every piece in a small apartment needs to earn its place. Multi-functional furniture helps you fit more living into fewer square feet.
- Sofa beds or daybeds: Offer seating by day, a full sleeping surface at night. Ideal if you don’t want your bed to dominate the room.
- Storage ottomans or benches: Hidden storage inside; coffee table, footrest, or extra seating on top.
- Drop-leaf or gateleg dining tables: Compact against the wall most of the time, expandable when you need a full table.
- Nesting tables: Pull out when you have guests; slide back together to free floor space.
- Desk–dining table hybrids: One larger table can function as both a workstation and dining surface if you keep clutter in check.
Fold-away pieces—like wall-mounted drop-leaf desks or folding chairs—let you reclaim precious floor space on days when you don’t need a full setup.
Use Walls and Vertical Space for Storage
In a studio apartment, the floor is prime real estate. Storing upwards instead of outwards keeps more of the floor visible and the space feeling open.
Think Tall, Not Wide
- Tall bookcases or cabinets take advantage of vertical space and draw the eye upward, making the ceiling feel higher.
- Wall-mounted shelves above desks, sofas, or along unused slivers of wall provide storage without adding bulk.
- High-mounted cabinets can extend kitchen storage or act as a mini-closet for out-of-season items.
Keep Visual Clutter Under Control
- Closed storage (doors, drawers, baskets) hides everyday mess like cords, papers, and small gadgets.
- Hooks and rails near the entry or kitchen corral coats, bags, utensils, and accessories vertically.
- Under-bed storage works well if your bed is low-impact visually. Use rolling bins or drawers with lids for a tidy look.
Store items you use daily in easy reach, and push rarely used things higher up. The less you have to dig through, the easier it is to keep the studio tidy and spacious-looking.
Keep a Cohesive, Calm Color Palette
Color is one of your best tools for making a studio feel larger and more unified. Too many competing colors and patterns can chop the room into pieces.
Light, Reflective Base Colors
- Light neutrals (soft whites, beiges, light greys, pale greige) reflect more daylight and help walls recede visually.
- Choose one main light color for walls and larger furniture pieces to create a continuous backdrop.
- Repeat this color in textiles—curtains, throws, rugs—to tie zones together.
Use Bold Color Intentionally
A spacious studio doesn’t have to be bland. You can add personality without visual chaos:
- One accent color carried through cushions, artwork, and smaller decor items creates cohesion.
- Feature walls or wallpaper work best as a focal point—behind the bed or sofa—rather than scattered around every surface.
- Keep patterns controlled: a couple of patterns in similar tones will feel more curated than many clashing prints.
The goal is for your eye to move smoothly around the room, not stop at every different color or pattern.
Make Daylight Work Harder
Natural light is one of the most powerful ways to make a small space feel bigger. The more daylight you can spread through the studio, the airier it feels.
- Keep windows as clear as possible. Avoid bulky furniture and large plants directly in front of them.
- Hang curtains high and wide. Mount curtain rods closer to the ceiling and extend them beyond the window frame so fabric doesn’t block glass when open.
- Choose light, airy window treatments. Sheers or light-filtering shades maintain privacy without sacrificing brightness.
- Use mirrors strategically. Place a mirror opposite or adjacent to a window to bounce light deeper into the room.
Resist the urge to cover every bit of wall with art or shelves near windows; keeping some surfaces clean lets the light feel stronger and the room less crowded.
Layer Lighting by Activity
In a single-room home, relying on one harsh overhead light makes everything feel flat and smaller. Layered lighting creates depth and flexibility, letting you adapt the mood to each zone.
- Ambient (general) lighting: a ceiling fixture or flush-mount provides overall light.
- Task lighting: desk lamps, under-cabinet kitchen lights, and reading lamps by the bed or sofa support specific tasks.
- Accent lighting: wall sconces, picture lights, or a small lamp on a shelf add warmth and draw attention to certain areas.
To keep the studio visually calm, aim for consistent bulb color temperature—for example, warm white (2700–3000K) everywhere—so different lamps don’t cast clashing tones.
Preserve as Much Open Floor as You Can
One of the main differences between a cramped and spacious-feeling studio is how much continuous floor area you see. The more the floor is visible, the more room your brain thinks you have.
- Edit your belongings. Be honest about what you actually use. Donate or store duplicates and “just in case” items.
- Choose furniture with legs. Sofas, chairs, and tables that are lifted off the floor expose more floor surface and feel lighter.
- Use one larger rug instead of several small ones if you want to visually unify the space and reduce visual chopping.
- Leave some corners empty. Not every wall needs a piece of furniture; negative space makes the room feel intentional, not sparse.
- Control cords and cables. Use cord channels or clips to keep wires against walls or under furniture instead of snaking across walkways.
As you arrange furniture, frequently step back and ask: Could I remove one piece and gain breathing room without losing function? Simplifying usually makes the space feel bigger.
Rethink the Bed: Loft or Murphy Only If It Truly Fits
Beds take up significant real estate in a studio, so creative solutions can be tempting. Loft beds and Murphy beds can be brilliant—but only when they suit your specific layout and lifestyle.
Loft Beds
Best for studios with high ceilings and occupants comfortable climbing:
- Pros: Frees space underneath for a desk, storage, or seating; creates a more defined “bedroom” zone.
- Cons: Requires enough ceiling height to sit up in bed; climbing may be inconvenient daily; can visually dominate the room if bulky.
If you consider a loft bed, opt for a slim, open design and keep whatever is underneath neat and organized so the area doesn’t feel crowded.
Murphy Beds (Wall Beds)
Ideal if you want to use the main room very differently by day and night:
- Pros: Opens up a large amount of floor space during the day; lets the room function more like a living room.
- Cons: Requires wall space and proper installation; you need to keep the area in front of it clear; daily folding can become tedious.
Ask yourself how you actually live: if you often lounge on the bed to read or work, a beautiful standard bed that’s integrated into the design might be more realistic than a fold-away solution.
A Practical Step-by-Step to Get Started
If you’re feeling overwhelmed, this simple process will keep your studio apartment design grounded and effective:
- Step 1: Define functions. List everything the studio needs to accommodate daily and weekly.
- Step 2: Measure and map. Measure the room and any furniture you plan to use. Sketch a layout with a clear main circulation path.
- Step 3: Place major pieces. Position the bed and main seating, ensuring they don’t block light or key walkways.
- Step 4: Add essential storage. Incorporate tall, vertical storage and closed units where clutter tends to collect.
- Step 5: Define zones subtly. Use rugs, furniture placement, and light dividers—only where they solve a real need.
- Step 6: Choose your palette. Pick a light base color, one or two accent colors, and keep patterns coordinated.
- Step 7: Layer lighting. Add lamps and task lighting to suit how you actually use each zone.
- Step 8: Edit ruthlessly. Before adding decor, remove anything that feels extra or makes walkways tight.
By following these steps, you avoid the trap of filling your studio with small, well-intentioned purchases that ultimately make it feel busier instead of larger.
Amazon Author page: amazon.com/author/didierlancelotDiscover More from Didier Lancelot
Narmer Store: narmerstore.orgAI and Technology Ebooks
Health, Lifestyle and Home Ebooks
Games and Music